2007 Kawasaki KLX 250s Kick Starter Install


Ok, so it was a thread by Finger Mullet that got me hooked. He made it look so easy!
I basically studied his tome for several weeks and amassed all the tools that I thought I would need.
My success was based in Finger Mullet's tome, the Kawasaki Manual (Part#99924-1165-03), some advice from a mechanic, and my husband (he never touched a tool so I didn't cheat!) being there so my Dyslexia would not get the best of me.

In all of the above sources, there is no step-by-step procedure anywhere.
The Kawasaki Manual is vague and shows some images that don't match exactly the 2007 KLX 250s.
Take your time with this as there are a few places where you can potentially destroy your bike.


I received the kit from Kawasaki.


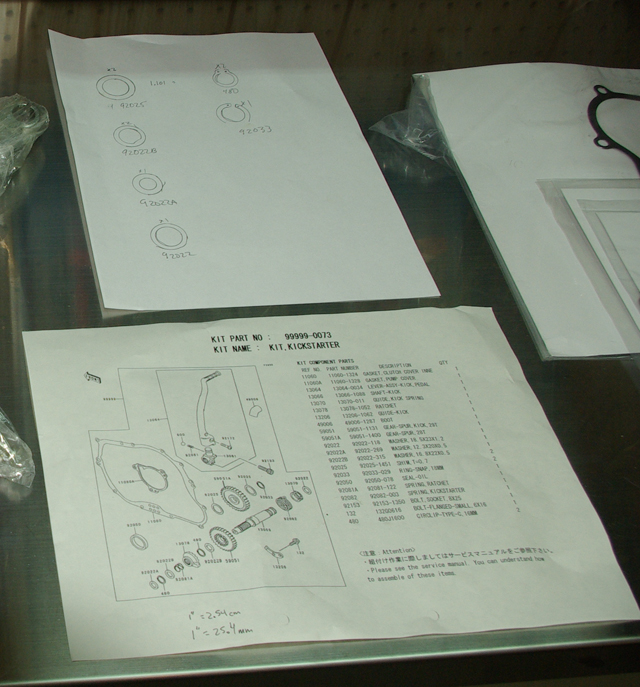
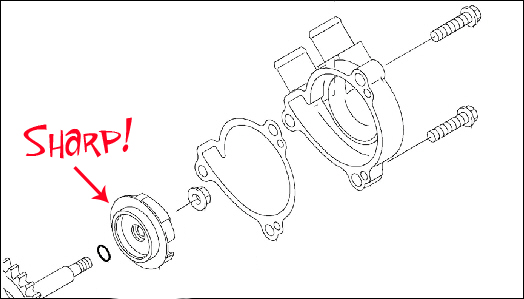
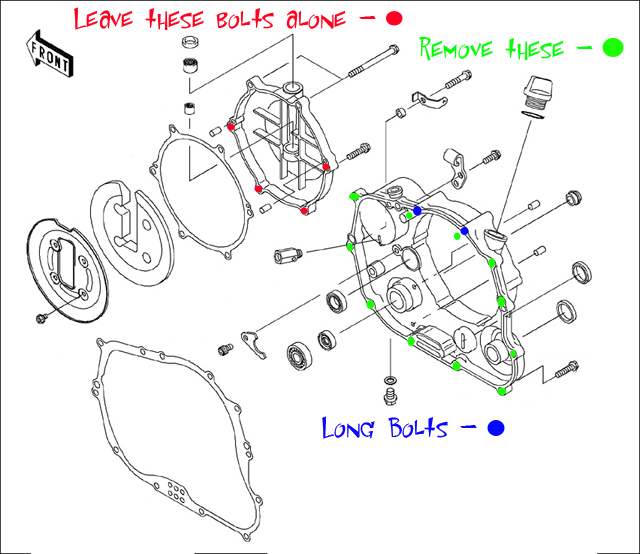
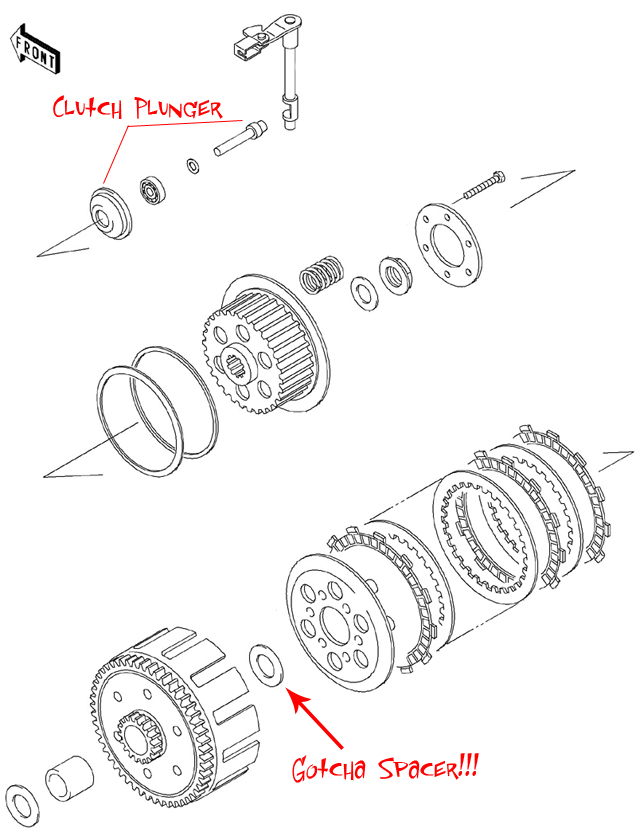
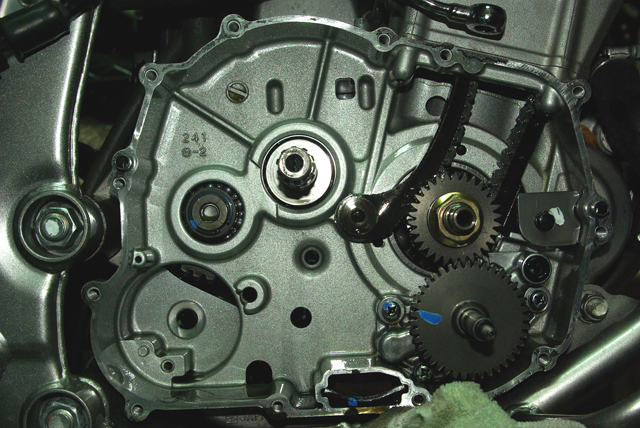
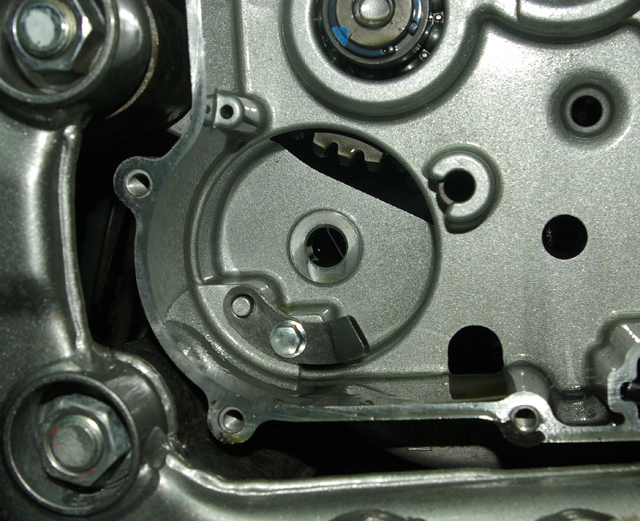
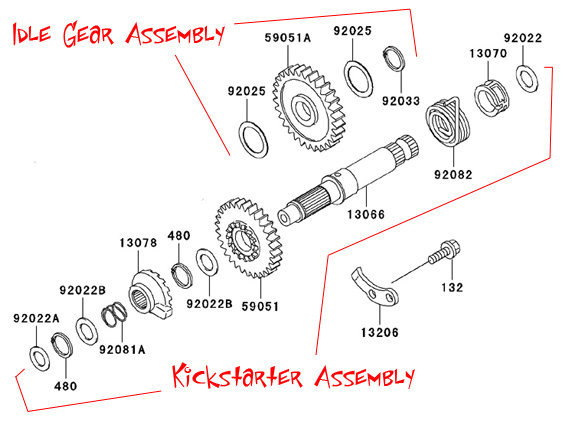
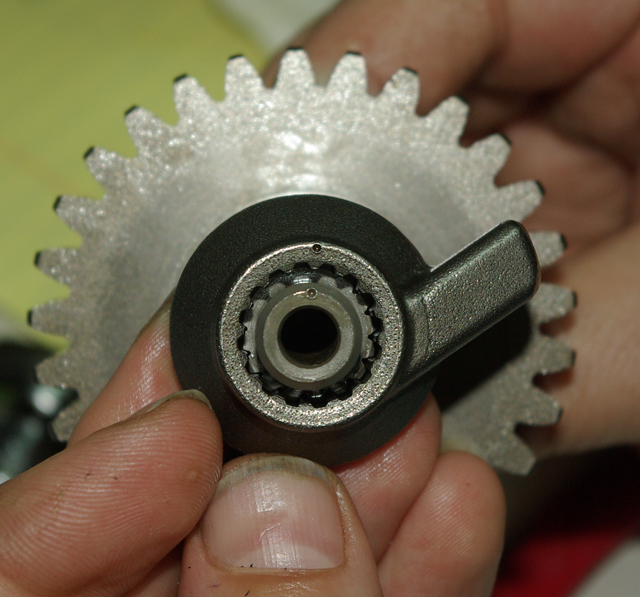
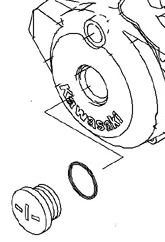
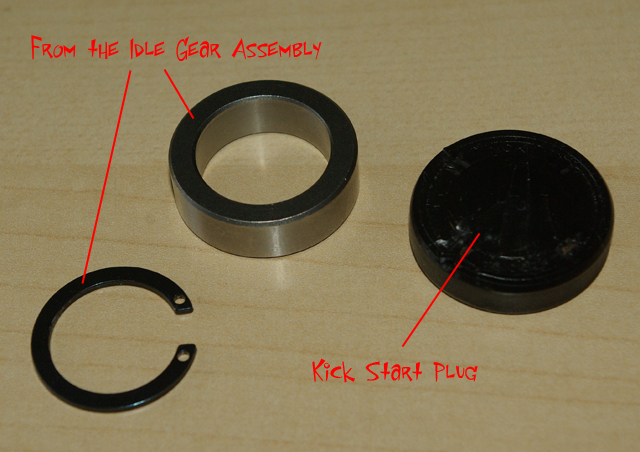
Everything in the kit is pretty well labeled, except for the bag that contains an assortment of clips, washers, a bolt and some other bits and pieces.
Like Finger Mullet I laid all the little pieces out on a piece of paper and identified everything.
My twist to this step was I traced the parts out on a piece of paper so I could place them over the tracing and identify the parts during assembly.

Overall it was a pretty easy (but scary) install made easy by having some specialized tools.

My process was modified from Finger Mullet's and Kawasaki's in that I did NOT do anything with the LEFT side magneto cover or engine cases.
I was prepared with the correct tools and had ordered the gaskets for the left side just in case.
The left side gaskets are NOT included in the Kick Starter Kit.

Ok, so here we go. How'd I do it?

  1. Get your space ready. I have all the tools that I need within easy reach.
  2. I drained all the fluids (Coolant and Oil) BEFORE I placed my KLX on the stand.
  3. I removed the RIGHT footrest.


  4. I disconnected the rear brake light bracket and brake pedal. I disconnected the rear brake pedal from the rear brake cylinder too.
  5. I disconnected the clutch cable from the clutch actuator arm and disconnected the mounting arm where it connects to the right side engine case.
  6. I disconnected the Oil Pipe banjo bolt where it comes into the right side engine case.
  7. I removed the Water Pump Housing, exposing the Water Pump Impeller.

  8. When the impeller and water pump housing is off, you can start to remove the right side case.
    You don't have to take the smaller clutch cover off, especially since there is no gasket for it in the kit.
    All the bolts are identical except for two longer bolts.


  9. When you have removed the right side case, and have taken the clutch plunger out, this is what it looks like.


  10. Next I took off the clutch basket with the Air Impact Wrench. The nut came off easy with the Air Impact Wrench!!!
    The clutch basket will come off without tools and you don't have to touch any of the clutch spring bolts.


    There is a little "Gotcha Spacer" that you need to watch out for!


    When you took the Clutch basket off, the whole thing came out.
    Since you never saw the "Gotcha Spacer", you were not aware that it fell down into the basket!
    I took the whole clutch assembly and placed it down.
    I didn't know about the "Gotcha Spacer" until I was putting everything back together and I heard a "Clink" when I moved everything around.
    Thank goodness I said "Hey ...something sounds loose in there!".
    On close inspection I noticed there was a spacer freely moving around between the outer basket and the friction plate assembly.
    That could have been disaster!!!
    Gotcha!!!

  11. When you have the clutch basket off, here is what things look like.


  12. In honor of Finger Mullet, I installed the Kick Starter Guide first.


  13. Next, you are going to put two assemblies together and place them in position.


    If you had done the prep step of knowing exactly where everything goes from the "little bag of tricks", this should go pretty easy.
    However there are two main "gotchas" in the assemblies.


  14. When you have the Idle Gear Assembly and the Kick Starter Shaft Assembly together and in place, it's time to reinstall the clutch basket.
    Remember the "Gotcha Spacer" and make sure it's on the shaft correctly.
    The cool thing about the KLX is that the clutch plate assembly slides out of the basket without you having to take the plates out.
    It's easy to make sure the "Gotcha Spacer" is where it's supposed to be when you put the basket together.
  15. When the clutch basket is on, (is the washer that sits under the nut have it's concave shape facing the engine/basket?), you will have to torque the nut. DO NOT USE the Air Impact Wrench to tighten!
    What I did (at the advice of a Kawasaki mechanic) was remove the LEFT side plug and put a socket on that nut while I torque the right side clutch Basket nut.

    It worked perfectly!


  16. When the clutch basket is torqued, you will next install the right side cover/lower again.
    Before you do that you will have to take/punch out the "Kick starter Plug" so the Kick starter Shaft will be able to pass through the right side lower.
    You will also want to clean the machined surfaces for the new gasket(s) since the old gasket(s) will be torn and stuck in various places.
    While you are cleaning the old gasket material off the lower cover, you might as well also to do the Water Pump Gasket too.
  17. Carefully put the right lower cover back on.
    Pay attention to the water pump shaft and seal.
    Pay attention to the oil passages.
    Watch the Guide pins.
    Is the O-ring still on the water pump shaft?
    Does the NEW gasket fit perfectly?
  18. Put all bolts back in making sure you put the two long bolts from the removal steps in their correct place.
    Torque the bolts with the small torque wrench since it will be in INCH Pounds.
  19. Re-install the Water Pump Impeller and torque the impeller nut. DO NOT USE the Air Impact Wrench to tighten!!!
    The Water Pump impeller nut will be able to be torqued to specification without any problem or need to grasp the impeller.
  20. Re-install the water Pump Housing (and NEW gasket) and torque the bolts.
  21. Re-install the Oil pipe Banjo Bolts
  22. Re-install the Clutch Cable and bracket
  23. Re-Install the Foot pegs, rear brake lever and anything else that you took off.
  24. When you are done it should look like this.


  25. Fill the bike up with Oil and Coolant again.
  26. When you are finished you will have the "Extra Pieces" you see here.


  27. You will be tempted to put the key into the ignition and fire/kickstart the bike.

    MAKE SURE THE KICKSTARTER WORKS CORRECTLY FIRST!!!


    You mess that up, and it's game over.


That's it!

Now for the disclaimer.

Obviously there are steps that I have left off. Obviously I may have missed a few things in my "How-to".
For me, this was a very challenging mod to do.
There were things I could have done wrong (and did).
My tools and shop are pretty well outfitted and I had plenty of time, light and support.
I had all my parts available and I had everything mapped out ahead of time.
I used Finger Mullet's tome as a guide. Some things I might have left out; I'm sure I did.
This mod can be done, just be sure you know what you're getting yourself into.

Lauren - Last edited Feb. 29, 2008